


Best Ways to Frame Antique Photographs: 2026 Guide
Table of Contents
- What You'll Need Before You Frame an Antique Photograph
- Step 1: Assess the Condition and Format of Your Antique Photograph
- Step 2: Choose Archival Framing Materials That Won't Damage Your Photo
- Step 3: UV Protection for Vintage Prints and Choosing the Right Glazing
- Step 4: Mounting Techniques That Keep the Photo Reversible
- How to Preserve Old Photographs Before and After Framing
- Step 5: Label, Insure and Document Your Framed Photographs
- Conclusion
- Frequently Asked Questions
Last Updated: September 12, 2026
What You'll Need Before You Frame an Antique Photograph
Framing an antique photograph is a preservation decision, not a decorating one: the best ways to frame antique photographs ensure every material that touches the print either slows its decay or accelerates it. At CV Treasures, we handle owner-sourced, one-of-a-kind historical photographs daily, and the questions we hear most often are about protecting them.
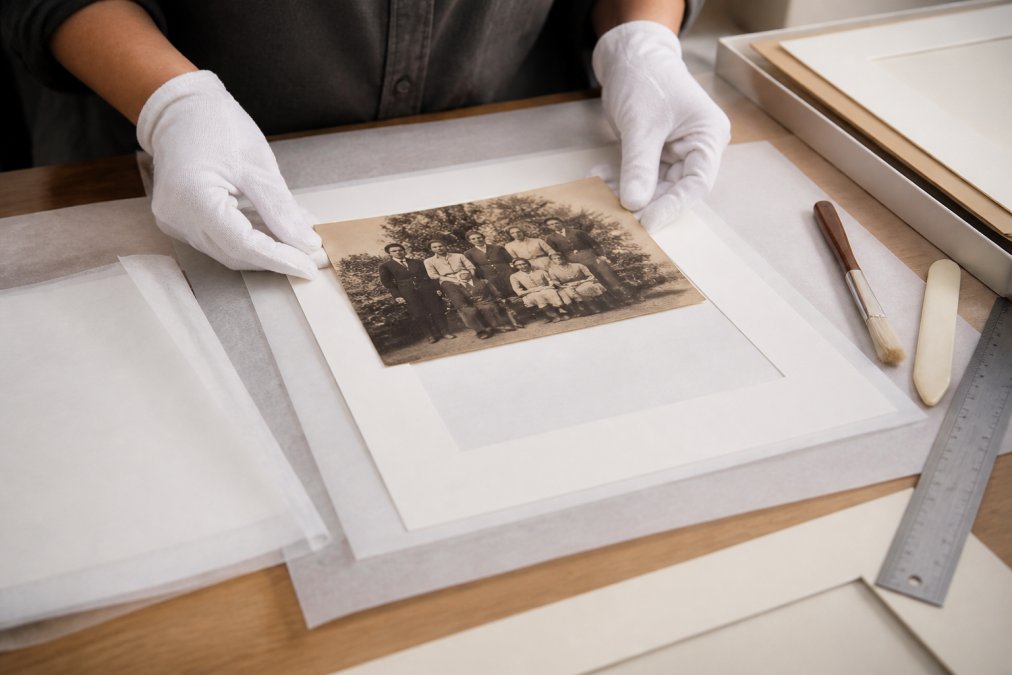
The best ways to frame antique photographs start with preparation. Gather these before you touch the print:
- White cotton or nitrile gloves to keep skin oils off the emulsion
- An acid-free, lignin-free mat board cut to the print's dimensions
- UV-filtering glass or acrylic glazing
- Archival hinging tape such as Filmoplast or Japanese tissue
- A backing board of archival corrugated board or foam board
- A dust cover for the frame's reverse side
- A soft brush for surface dust
A common mistake is buying a frame first and materials second. What sits between the print and the glass determines whether the photograph survives another fifty years.
Step 1: Assess the Condition and Format of Your Antique Photograph
Condition assessment comes before any framing decision. A silver gelatin print, a tintype, and a daguerreotype each demand different handling; treating them alike damages irreplaceable pieces.
Identifying Tintypes, Daguerreotypes and Glass Plate Negatives
A tintype is an image on a thin sheet of lacquered iron, usually dark and slightly magnetic. A daguerreotype is a silvered copper plate with a mirror-like surface, often in a hinged case. Glass plate negatives carry the image on a coated glass substrate and are the most fragile of the three.
Hold each type by its edges only. Daguerreotypes scratch if you breathe on them wrong.
Handling Fragile Substrates and Emulsion Surfaces
The emulsion is the light-sensitive coating that holds the image. On antique prints it cracks, flakes, and lifts at the corners. Never press down on a lifting emulsion, and never use tape on a print: residue stains paper permanently and causes acid migration.
Step 2: Choose Archival Framing Materials That Won't Damage Your Photo
Archival framing materials are proven not to release acids or other compounds that degrade paper and photographic emulsions. The standard: acid-free, lignin-free, and where appropriate, buffered.
Acid-Free, Lignin-Free and Buffered Board Explained
Acid-free means neutral or slightly alkaline pH. Lignin-free means no wood lignin, which breaks down into acids as it ages. Buffered board carries an alkaline reserve, typically calcium carbonate, that neutralizes migrating acids. Non-buffered board suits color photographs and cyanotypes, where alkalinity can shift the image.
Ordinary acidic cardboard and craft-store foam core will yellow a photograph within a decade, the most common framing mistake, and entirely avoidable.
Step 3: UV Protection for Vintage Prints and Choosing the Right Glazing
UV protection for vintage prints is the difference between an image that holds its tones and one that fades to a pale ghost. Ultraviolet light drives the chemical reactions that break down dyes and silver compounds, and it comes from sunlight and fluorescent fixtures alike. The damage is cumulative and irreversible: a print receiving a few hours of indirect sun daily can lose noticeable highlight density within a decade, while the same print behind proper glazing in a dim hallway may look unchanged for fifty years.
Glazing is the glass or acrylic that sits in front of the print. The options are:
| Glazing Type | UV Blocking | Best For | Trade-off |
|---|---|---|---|
| Standard glass | Minimal | Temporary display | No real protection |
| UV-filtering glass | High | Most framed antiques | Slight green tint |
| Museum glass | Highest | Valuable pieces | Higher cost |
| Acrylic (UV grade) | High | Large or shipped frames | Static attracts dust |
Museum glass combines high UV filtering with an anti-reflective coating, which matters when a framed print hangs opposite a window. A spacer between glazing and print prevents the image from touching the glass, where condensation and sticking occur.
How UV Damage Actually Happens in an Antique Print
UV radiation supplies the activation energy for oxidation in the image layer. In a silver gelatin print, metallic silver converts to silver oxide, reading as a yellow or brown shift in the highlights (PubMed). In a color print, the cyan, magenta, and yellow dyes fade at different rates, so the image drifts toward magenta or green before losing contrast. A tintype is comparatively resistant because the image sits in a lacquered collodion layer on iron, but the lacquer yellows and crazes under UV. A daguerreotype is the most vulnerable: its silver-mercury image layer sits on an unprotected polished plate, and even brief direct light can accelerate silver mirroring, the bluish metallic haze that obscures the image.
Glazing should follow the format, not the frame. For a daguerreotype or ambrotype, museum glass with a spacer is the minimum, and many conservators recommend keeping the piece cased and displaying a high-quality digital reproduction instead. For a paper print, UV-filtering glass suffices in most rooms. For a large or shipped frame, UV-grade acrylic is practical: it weighs roughly half as much as glass and resists shattering.
Spacers, Seals, and the Frame Package
A spacer is a thin strip of archival foam or mat board that holds the glazing off the print. Without one, temperature and humidity changes fog the glazing inside, and the print can stick to the glass; when pulled away, emulsion lifts with it. This preventable damage is irreversible.
The rest of the frame package matters too. A dust cover keeps insects, grit, and airborne pollutants out. Sealing the edges with archival tape slows the interior environment tracking the room. An archival corrugated or foam backing board adds rigidity so the print does not flex against the glazing.
Matching Glazing to the Display Location
Glazing is only half the equation; the room is the other half. A print on a wall receiving direct morning sun fades faster than the same print behind the same glass in an interior hallway. If the only wall faces a window, use museum glass and rotate the piece every six months. For a daguerreotype, tintype, or glass plate, consider displaying a reproduction and storing the original in a climate-controlled archival box. Glazing protects the print from light; it cannot protect it from a bad location.
Step 4: Mounting Techniques That Keep the Photo Reversible
Reversible mounting preserves both the photograph and its market value. Anything permanent reduces a piece from a collectible to a decoration. But reversibility looks different for a paper print than for a tintype, daguerreotype, or glass plate negative, and treating all four alike damages irreplaceable pieces.
Hinging vs. Dry Mounting: What Works for Antique Paper
Hinging attaches the print to the mat board with thin strips of archival tape or Japanese tissue along the top edge, letting the paper expand and contract with humidity. Dry mounting uses heat-activated adhesive to bond the print flat to a board. It is fast and looks clean, and it is exactly what you should never do to an antique.
Paper is hygroscopic: it absorbs and releases moisture as humidity changes, expanding and contracting (si.edu). A hinge along the top edge lets the print move. A dry mount locks it to a rigid board, so every humidity cycle stresses the paper against the adhesive, producing cockling, cracks along the image edge, and adhesive migration. None of it is reversible.
Use a miter box for clean frame corners, and finish the back with a dust cover to keep insects and grit out of the frame package.
Mounting Tintypes, Daguerreotypes, and Glass Plate Negatives
These three formats are where most framing guides stop being useful: none is a paper print, and none can be hinged like a silver gelatin print.
Tintypes are lacquered collodion images on thin iron sheets: rigid, slightly magnetic, often warped from a century of handling. Do not hinge one. Instead, build a sink mat: cut a window in archival mat board slightly larger than the tintype and set the plate into it so its edges rest on the board. Gravity and the mat window hold it, not adhesive. This is fully reversible and keeps the lacquer surface off the glazing.
Daguerreotypes are silvered copper plates with a mirror-like surface that scratch if you breathe on them wrong. Most were housed in a hinged case with a cover glass and preserver frame. The safest approach is to keep the case intact and frame the entire case, or display a reproduction and store the plate in its case. If framed outside its case, the plate should sit in a sink mat with a cover glass held off by a spacer, and never be touched on the image side.
Glass plate negatives are the most fragile of the three. The image sits in a gelatin emulsion on glass, and the emulsion can lift, flake, or separate entirely. Never hinge a glass plate or press on the emulsion. Store and display glass plates vertically, in a sink mat or custom archival box, with the emulsion side facing away from any abrading surface. If the emulsion is already lifting, do not frame the plate; consult a conservator first.
The Sink Mat: A Reversible Mount for Rigid Formats
A sink mat is the standard reversible mount for any rigid antique format. Cut a window in archival mat board slightly larger than the object, set the object into it so its edges rest on the board, and cover it with a second mat or a spacer and glazing. The mat's geometry holds it, not adhesive. Nothing touches the image surface, and the mount disassembles in seconds with no residue.
For a tintype, cut the window to the plate's dimensions plus a small allowance so it does not bind. For a daguerreotype, make the sink mat deep enough that the cover glass clears the plate surface. For a glass plate, support all four edges so no single edge carries the weight.
How to Preserve Old Photographs Before and After Framing
Knowing how to preserve old photographs means controlling the environment, not just the frame. Temperature, humidity, and light do more long-term damage than any material choice.
Climate Control, Storage and Display Environment
Relative humidity between 30 and 50 percent is the target range for photographic materials, with stability mattering more than any single reading. Fluctuation causes silver mirroring, the metallic sheen on degraded photographic surfaces, and warps paper. Hang framed pieces on interior walls away from vents, fireplaces, and direct sun.
For unframed pieces, store prints flat in archival boxes with archival tissue between them. A substrate of archival board beneath each print prevents flexing.
Step 5: Label, Insure and Document Your Framed Photographs
Documentation protects value in ways the frame cannot. Labeling and insurance matter for any piece worth owning.
Identification and labeling should be done on the backing, never on the photograph. Write the date acquired, the source, and any known provenance on an archival label affixed to the dust cover. Provenance is the documented history of an object's ownership, and it separates a verified antique from an unattributed print.
For insurance and appraisal, photograph the framed piece front and back, keep receipts and authentication paperwork together, and have significant pieces appraised by a qualified appraiser. Update the valuation every few years, since the market for historical photographs moves.
A digital reproduction of each piece serves two purposes: it gives you a reference image if the original is ever damaged, and it lets you share the work without exposing it to handling. Photo restoration of a digital file is reversible and safe. Restoration of the physical print is not, and should be left to a conservator.
Conclusion
Framing an antique photograph correctly takes more care than most people expect, and the pieces that survive are the ones whose owners treated preservation as the point rather than an afterthought. Materials, mounting, glazing, and environment must work together.
CV Treasures exists for collectors who want that standard applied from the start. Every piece we offer is owner-sourced and strictly original, with no reproductions or fakes, and our authentication work follows PSA standards, including PSA TYPE II. When you buy from us, you get a one-of-a-kind artifact with documented provenance, ready to be framed and displayed with confidence.
Get started with CV Treasures and add a genuine piece of history to your collection.
Frequently Asked Questions
What is the best way to preserve an antique photograph?
Use archival framing materials, including acid-free, lignin-free mat board and backing, and UV-filtering glass or museum glass. Mount the photo with reversible hinging rather than tape or glue, and keep it out of direct sunlight. For long-term storage, maintain relative humidity between 30% and 50% and store the photo in an archival box away from heat and moisture. Digitizing the image first gives you a backup if the original is ever damaged.
Should I use glass or acrylic when framing old photos?
Glass offers better clarity and scratch resistance for framing antique photographs, while acrylic is lighter and safer for large or wall-mounted pieces. For UV protection for vintage prints, choose either glass or acrylic treated with a UV-filtering coating. Museum glass reduces glare and blocks the most UV light, which matters for photos displayed in bright rooms. Whichever you choose, add a spacer so the glazing never touches the emulsion surface.
Does framing an antique photo decrease its value?
Framing does not decrease value when the process is reversible. Use archival framing materials and hinging techniques that allow the photo to be removed later without residue or damage. Avoid dry mounting, tape, and acidic cardboard, which can cause acid migration and permanently bond the photo to a backing. Keep the original frame, backing and any provenance documentation, because collectors and appraisers value a complete, unaltered history.
How do I frame an oddly sized antique photograph?
Have a custom mat board cut to fit the exact dimensions, leaving at least 2 to 3 inches of mat visible around the photo. A wider mat protects the edges and gives the eye room to rest on the image. If the photo is a tintype, daguerreotype or glass plate, keep it in its original case or housing and frame the entire assembly behind UV-filtering glass with a spacer. Never trim the photo to fit a standard frame size.